
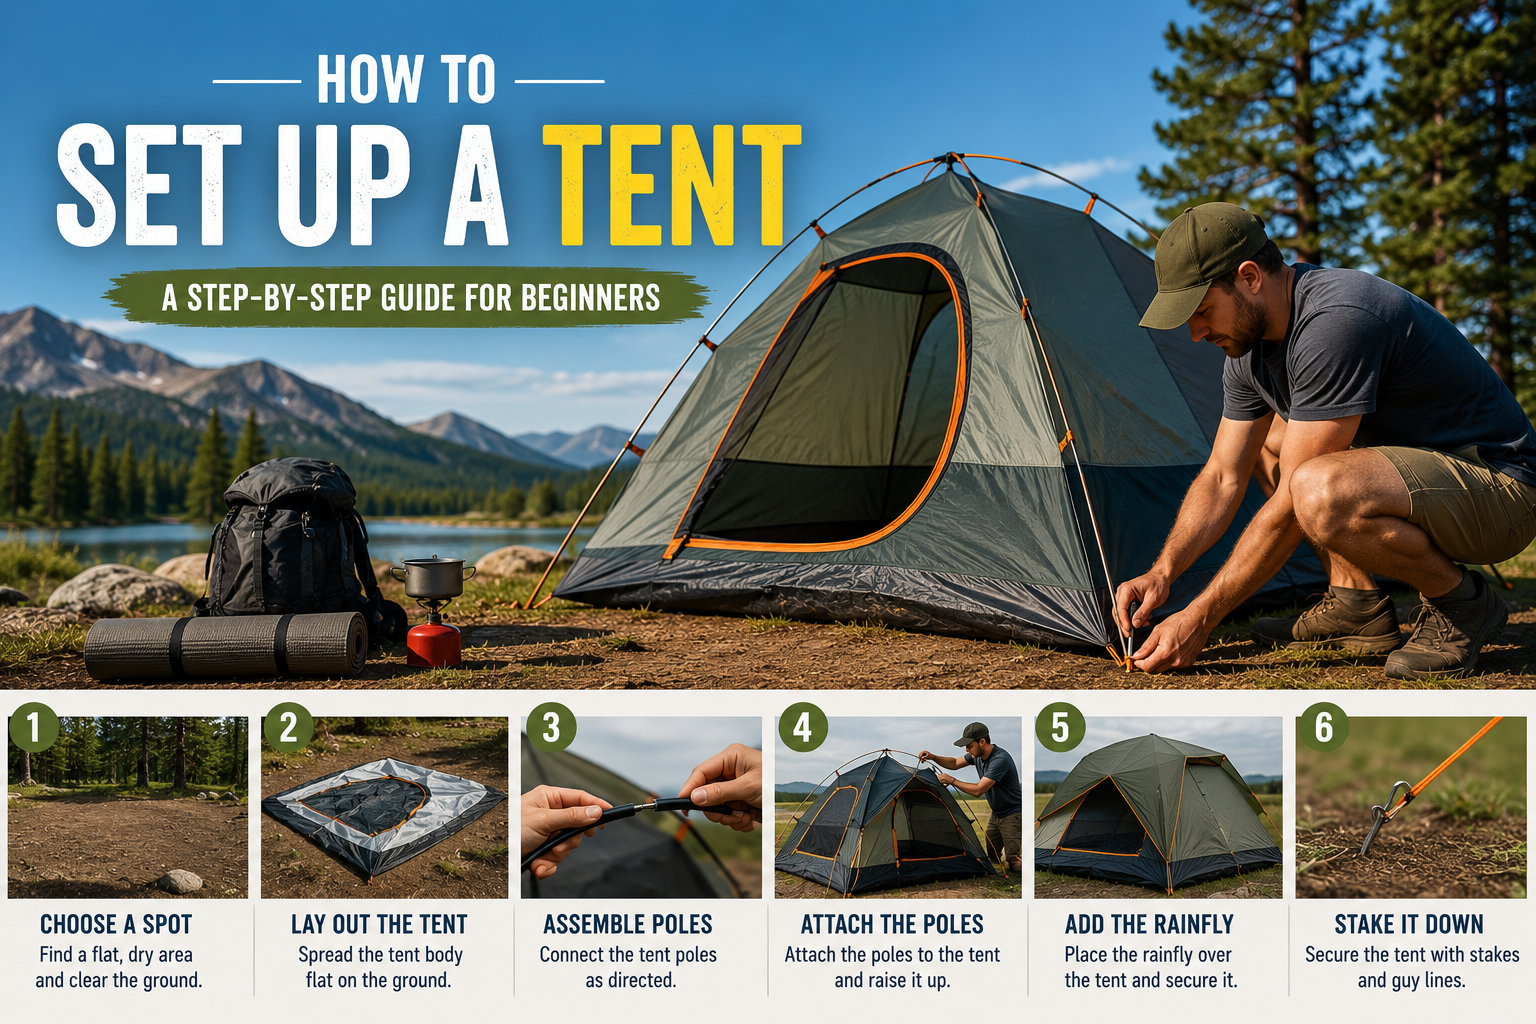
How to Set Up a Tent: A Step-by-Step Guide for Beginners
Learning how to set up a tent is one of the first skills every camper should master.
At first, putting up a camping tent can seem confusing. There are poles, clips, stakes, rainflies, and several pieces that may not be immediately obvious.
The good news is that most modern tents are designed to make setup relatively simple.
Whether you’re preparing for your first camping trip or you’ve just purchased a new tent, this guide will show you how to set up a camping tent step by step.
By the end, you’ll know how to choose a good campsite, assemble your tent, secure it properly, and prepare it for changing weather.
Quick Answer: To set up a tent, choose a suitable flat campsite, clear the ground, lay out the tent, assemble the poles, attach the poles to the tent body, install the rainfly, and secure everything with stakes and guy lines.
What You Need to Set Up a Tent
Before you start, make sure you have all the parts of your tent.
Most camping tents include:
- Tent body
- Tent poles
- Rainfly
- Tent stakes
- Guy lines
- Carrying bag
- Pole bag or storage sack
Some tents may also include a footprint, which sits underneath the tent and helps protect the floor.
If you’re setting up a new tent for the first time, check the manufacturer’s instructions before starting.
Step 1: Choose the Right Campsite
Where you place your tent matters just as much as how you assemble it.
Look for an area that is:
- Relatively flat
- Free from sharp rocks and branches
- Away from potential falling branches
- Not in a low area where water could collect
- Suitable for camping according to local regulations
Avoid setting up directly in a drainage area or depression.
Even if the weather looks clear, rain can quickly change the conditions around your campsite.
Think about the wind
If possible, position your tent so that its most wind-resistant side faces the prevailing wind.
Your campsite should provide reasonable shelter without putting you underneath unstable trees or other hazards.
Step 2: Clear the Ground
Before putting your tent down, inspect the area carefully.
Remove:
- Small rocks
- Sticks
- Pine cones
- Sharp objects
- Other debris
You don’t need to completely modify the campsite. Simply remove objects that could damage your tent or make sleeping uncomfortable.
Leave the area as natural as possible.
Step 3: Lay Out Your Tent
Take the tent body out of its bag and spread it across the area where you want to sleep.
Make sure you know where the doors are facing.
Think about convenience when choosing the direction of your tent door.
For example, you may want the entrance facing toward your campsite rather than directly toward a muddy or busy area.
If your tent has a footprint, place it underneath the tent first.
Make sure the footprint doesn’t extend significantly beyond the edges of the tent because exposed material can collect rainwater underneath the tent.
Step 4: Assemble the Tent Poles
Next, connect the tent poles according to the manufacturer’s instructions.
Many modern tents use shock-corded poles that connect together easily.
Lay the assembled poles next to the tent so you can identify where each one belongs.
Beginner tip
Don’t force a pole into place.
If something doesn’t seem to fit, stop and check the instructions.
Forcing components can damage the poles or the tent.
Step 5: Attach the Poles to the Tent
Now it’s time to connect the poles to the tent body.
Depending on your tent design, you may:
- Slide poles through sleeves
- Attach poles to clips
- Connect poles to corner grommets
Many modern tents use a clip system because it makes setup faster.
Once the poles are connected, the tent should begin taking shape.
Step 6: Raise the Tent
Carefully lift and connect the tent poles according to the manufacturer’s design.
Some tents become freestanding at this point, meaning they can stand without stakes.
Even if your tent is freestanding, you should still stake it down when appropriate, particularly when wind is possible.
Once the tent is standing, check that the fabric isn’t excessively twisted or pulled in an unusual direction.
Step 7: Secure the Tent With Stakes
Now secure your tent to the ground.
Place the stakes through the designated loops or rings around the tent.
Push them into the ground at an angle appropriate for the tent manufacturer’s instructions and local ground conditions.
Avoid hammering stakes excessively hard into rocky ground.
If the ground is difficult, repositioning the tent may be better than damaging the equipment.
Step 8: Attach the Rainfly
The rainfly is one of the most important parts of your tent when rain is possible.
Place the rainfly over the tent and connect it according to the manufacturer’s instructions.
Make sure:
- The doors line up
- Ventilation openings aren’t blocked unnecessarily
- The rainfly extends properly over the tent
- Buckles and attachment points are secure
The rainfly should generally be positioned so that water can run off rather than collect on top of the tent.
Step 9: Use the Guy Lines
Many tents come with guy lines that provide additional stability.
Guy lines can be particularly useful in windy conditions.
Attach them to the designated points on your tent and secure them to appropriate anchors.
Don’t create unnecessary trip hazards around your campsite.
If you’re camping with children, make sure everyone knows where the lines are located.
Step 10: Check Your Tent Before Going to Sleep
Your tent is now almost ready.
Before settling in, perform a quick inspection.
Check:
☐ Tent poles are properly connected
☐ Stakes are secure
☐ Rainfly is correctly positioned
☐ Doors and zippers work properly
☐ Guy lines are secure
☐ Ventilation is adequate
☐ No sharp objects are underneath the tent
☐ Important gear is organized inside
Taking two minutes to check everything can prevent problems later
How to Set Up a Tent in the Rain
Setting up a tent in the rain isn’t ideal, but sometimes it’s unavoidable.
The goal is to keep the inside of your tent as dry as possible.
Choose your location carefully
Avoid low areas where rainwater may collect.
Work efficiently
Have the tent, poles, rainfly, and stakes ready before you begin.
Keep the tent interior protected
Try not to leave the tent body lying exposed on wet ground longer than necessary.
Use the rainfly strategically
Some tent designs allow the rainfly to be positioned before the tent body is fully exposed.
Check your tent’s instructions to see whether this is possible.
Dry your equipment later
Once conditions improve, open the tent and allow damp equipment to dry properly.
How to Set Up a Tent in Wind
Strong wind can make tent setup much more difficult.
If you’re expecting windy conditions:
- Choose a naturally sheltered campsite
- Keep the tent low to the ground during setup
- Stake the tent as soon as practical
- Use guy lines
- Keep loose equipment secured
- Follow the manufacturer’s setup instructions
Don’t camp under dead or unstable trees simply because they provide wind protection.
Safety should always come first.
Common Tent Setup Mistakes to Avoid
Even experienced campers can make mistakes.
Here are some of the most common ones.
1. Choosing a Bad Location
A beautiful campsite isn’t necessarily a safe campsite.
Avoid areas vulnerable to flooding, falling branches, or other obvious hazards.
2. Skipping the Footprint Instructions
If you’re using a footprint, make sure it is positioned correctly and doesn’t extend beyond the tent floor.
3. Not Using the Rainfly
Clear skies at sunset don’t guarantee clear skies overnight.
If rain is possible, prepare your tent accordingly.
4. Forgetting Ventilation
Closing every opening may seem like a good way to stay warm, but poor airflow can increase condensation.
Use the ventilation features designed into your tent.
5. Never Practicing at Home
One of the best things you can do before your first camping trip is set up your tent in your backyard or another suitable location.
This lets you learn the process without pressure.
How Long Does It Take to Set Up a Tent?
The setup time depends on the tent design and your experience.
A simple two-person tent may take only a few minutes once you’re familiar with it.
Larger family tents can take considerably longer.
The first time you set up a tent, don’t worry about speed.
Focus on doing it correctly.
After a few trips, the process will become much faster.
How to Make Tent Setup Easier
Want to make camping easier?
Try these simple tips:
Practice Before Your Trip
Set up the tent at home at least once.
Organize Your Gear
Keep poles, stakes, and the rainfly together.
Read the Instructions
Don’t assume every tent works the same way.
Set Up Before Dark
Whenever possible, arrive at your campsite early enough to set up while you still have daylight.
Keep Your Setup Simple
You don’t need to unpack everything immediately.
Set up your shelter first, then organize the rest of your campsite.
What to Do After Setting Up Your Tent
Once your tent is ready, organize the interior.
Keep frequently used items within easy reach.
For example:
- Headlamp near your sleeping area
- Water bottle beside your sleeping bag
- Shoes near the entrance
- First-aid kit somewhere accessible
- Important electronics protected from moisture
Avoid bringing food inside your tent when local wildlife guidance recommends storing food elsewhere.
Always follow the rules and recommendations for the area you’re camping in.
How to Take Down a Tent
Taking down your tent correctly is just as important as setting it up.
Before packing:
- Remove your belongings.
- Clean out dirt and debris.
- Remove the rainfly.
- Remove the stakes.
- Disconnect the poles carefully.
- Let wet equipment dry whenever possible.
- Fold or roll the tent according to the manufacturer’s instructions.
- Pack all components together.
Important tip
Never store a tent wet for a long period.
Moisture left inside a packed tent can lead to unpleasant odors and damage over time.
If you have to pack a wet tent because of rain, unpack and dry it as soon as you can.
Best Tent Setup for Beginners
If you’re new to camping, choose a tent that makes setup simple.
Look for:
- Freestanding design
- Simple pole system
- Color-coded attachments
- Easy-to-use clips
- Good ventilation
- Reliable rainfly
- Clear setup instructions
A simple tent can help you spend less time struggling with equipment and more time enjoying your campsite.